My Coconut Chicken Chickpea Curry (Quad C)
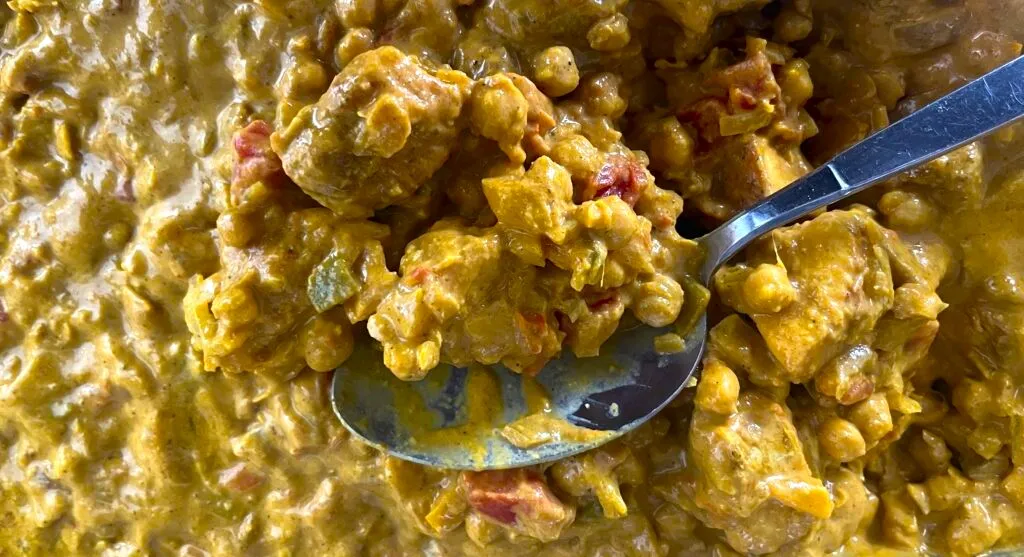
This is a recipe that I keep finding myself coming back to and am able to just not get tired of, so I decided to write up my process for this recipe in hopes someone else finds this useful.
Why?
As a fully remote worker, I’ve found that I need to have something prepared, otherwise I will reach for the apps and order fast food. As someone who likes lifting weights, it is not good when this happens. This meal prep has been:
- Cheap – It’s around $80 for 3 weeks of food with 2 prep days.
- Tasty – I love Indian food.
- Healthy – I don’t know the hard nutrient counts, but there’s lots of good and not a lot of bad in this.
- Quick – After the 2-3 hours of prep, it takes 5 minutes from feeling hungry to actively eating.
Origins
My significant other was craving coconut curry, so she used ChatGPT to generate a recipe. I read through it, and the directions were solid enough, but I made some personal touches to improve it.
Sides
My choice of side is white rice. Recently, I’ve been making fortified rice (another significant other invention). It’s 2 parts white rice, 1 part quinoa, 1 part lentils. Throw all of it into a rice cooker, and let it cook. Add more water and run again if it’s too gritty. I also like using pickled onions as a garnish/addition to the curry.
Ingredients
For 1 giant tub of Quad C, possess the following food:
- 4 lbs. of Chicken Breast, cut into 1 inch cubes
- 4 Yellow Onions, diced
- 4 Bell Peppers, diced
- 1 cup of Garlic Ginger Paste
- Indian grocery stores typically have large jars of this. Great to have on hand.
- 1 cup of leafy greens
- Spinach or Bok Choy work well.
- 4 cans of Diced Tomatoes
- 4 cans of Chickpeas, drained
- 3 cans of Coconut Milk
- Avocado Oil
- 8 tbsp of Curry Powder
- 3 tbsp of Garam Masala
- 3 tbsp of Ground Cumin
- 3 tbsp of Tumeric
- 3 tbsp of Coriander
- 2 tbsp of Chili Powder
- Salt
Preparations
I prefer cooking this in a 5.5 quart dutch oven, however, with everything in it, it’s close to overflowing, so anything a little bit bigger should work great if following the exact measurements above.
I’ve found it very important to lay the groundwork before beginning to cook this. This dish requires near constant stirring to prevent burning on the bottom of the dutch oven.
Here are my recommendations:
- Season the chicken with salt after dicing and let it rest at room temp for 30 minutes.
- Dice the onions and place into a large enough bowl.
- Do the same thing for the bell peppers as above.
- Open the tops of your spices and GG paste jar for easy access.
- Open the cans so you can grab and dump into the dutch oven.
- Keep cold water on hand as you will be spending a lot of time in front of a hot stovetop.
Ordering of Ingredients
I find it very useful to order the ingredients in a way that aligns close enough to how I’m going to use them. Here’s my preferred order.
- Chicken
- Onions
- GG Paste
- Bell Peppers
- Spices
- Diced Tomatoes and Coconut Milk
- Chickpeas
- Chicken (again)
- Leafy Greens
It’s time to cook
I recommend reading this once or twice over before starting to cook so that you know what to expect. The first step is to sear the chicken. Have a clean bowl ready to dump the seared chicken into.
- Heat up the dutch oven to the high end of medium high.
- Add some avocado oil, about 1 tbsp.
- Add enough chicken to cover the bottom, but not too many such that you end up steaming it.
- Once seared on multiple sides, dump into the clean bowl.
- Repeat 3-4 for the rest of the chicken.
- Once all chicken is seared, place into the oven to rest until we need it again.
- Add all of the onions into the dutch oven.
- Stir and scrape until the onions are sweating a little bit.
- Make sure the bottom is clean through your scraping. We don’t want the fond to burn.
- You will get very good at stirring and scraping by the end of this.
- Add the GG paste in and keep stirring and scraping until the onions are a little more sweat.
- Add in the bell peppers and keep stirring and scraping until these are also sweat.
- Add in all of the spices.
- This step will make the contents a bit dry. Just keep stirring and scraping and breaking it up so that you have a paste.
- Add in the tomatoes and coconut milk and mix.
- At this point, you should have a thin sauce. Grab a stool, because we want to keep stirring and scraping the bottom for about 30-45 minutes for it to reduce. Keep tasting it every 10 minutes until it is how you like. Don’t be afraid of salt.
- Add in the chicken to cook it completely. A meat thermometer helps here.
- Add in the chickpeas. Continue stirring and scraping for about 5-10 minutes.
- Now is the time that it will get more difficult to stir if you have a 5.5 quart dutch oven. I’ve found gently stirring separately from scraping the bottom to be effective.
- Add in your leafy greens. These will cook quickly, so throw them in and push them down into the curry to cook.
- You are finally complete. Turn the stovetop off and let it cool.
Storage
Because the dutch oven is very hot and heavy, even after letting it cool for a bit, I like to use a large mug to scoop it out and empty into a large tupperware container.
This will last around 1-2 weeks.
Thank you
Thank you for reading this all the way through. If you have any suggestions for improving this recipe, please feel free to send me an email.